
❤️❤️ Happy Valentines Day!! Celebrate your loved ones on this special day!! XoXo 😘😘
Cheers
Lavanya

Fun & Engaging Activities for Kids – Science, Math, Arts, Crafts, Sensory play, Fine motor play…
❤️❤️ Happy Valentines Day!! Celebrate your loved ones on this special day!! XoXo 😘😘
Cheers
Lavanya
Snow sensory bin is best way to play with snow and stay warm when its freezing cold outside and your stuck home all day.

I filled a plastic storage bin with some snow, added some Acrylic Hearts, Heart cookie cutters, Sweet shoppe tools(from another play set), muffin pan, cups & spoons to it. Viola! The snow bin was all set to play with.

This is our first snow sensory bin and Miss A(3yrs) & Miss D(2yrs) loved it alot. They made icecreams, cones, muffins, hearts, cupcakes… ahh so much fun. I used a quilt and a dollar store sheet on top of it to catch any mess. They loved scooping & filling the bowls with snow and then dumping it back.

The longer they played with the snow – we were able to observe the different characteristics of snow. First it got a little soft, then wet and eventually slushy…
View original post 41 more words
 Counting Hearts is a simple valentine themed math activity for preschoolers to practice counting and number recognition.
What you need
How to

Miss A(3yrs) loved to touch and use the heart gems. They were very cute and irresistible. We arranged the numbers in numerical order and then picked one of them to count with. She usually counts only upto 6 in any counting activities so i gave her numbers 1-6, but with this she wanted to try counting with more numbers and so we counted upto…
View original post 25 more words
 This Frosty the Snowman activity tray is very simple and open ended and is perfect for busy bags. It takes less than 10 mins to set up and is so much fun for the kids while working on fine motor & color recognition skills. We paired this activity with our favourite book Frosty the Snowman.
What you need
How to
View original post 226 more words
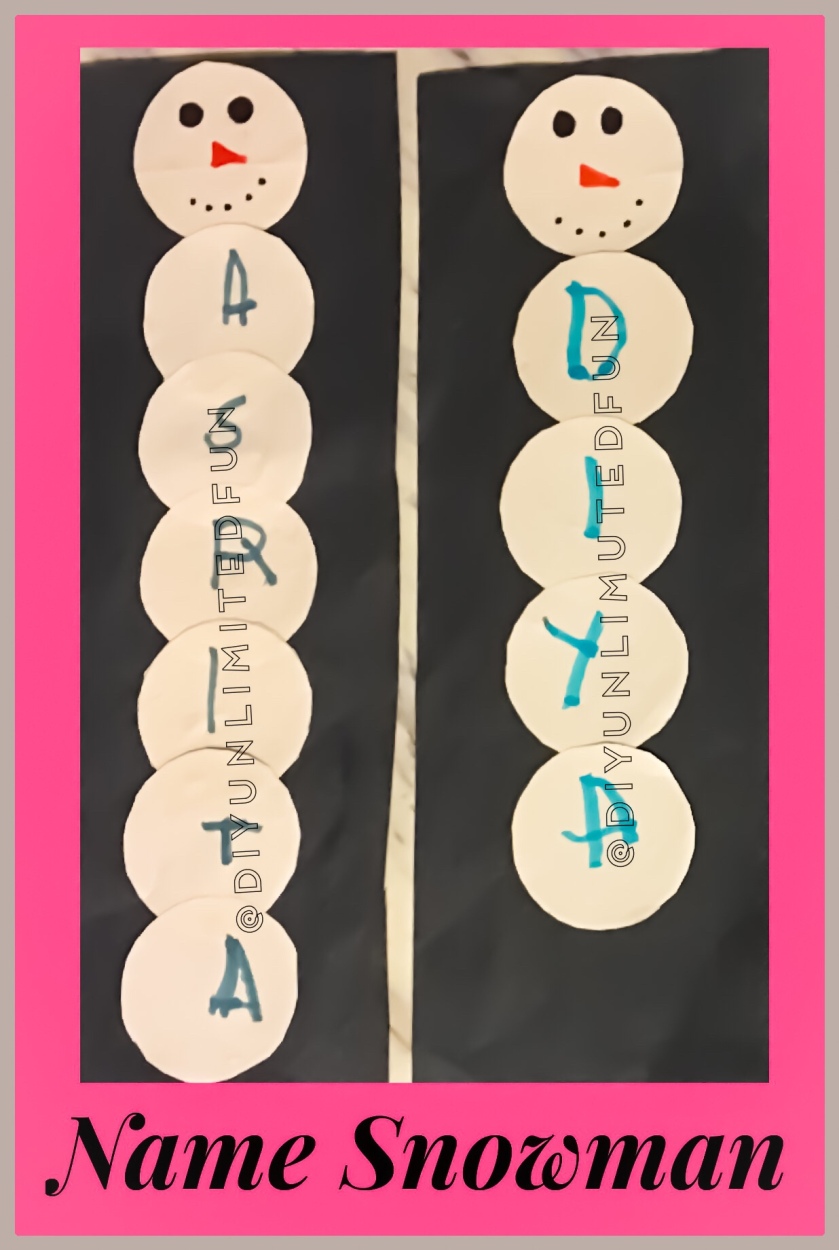
Name Snowman is a fun way for kids to learn their names. This activity combines arts and crafts, letters, kids names, and snowman – a perfect winter activity for preschoolers to try.
Follow us on Facebook
What you need
How to
Miss A(4) knows to spell & write her name now. She wrote the letters in her name on the snowballs and glued the snowman together on a black paper. She dint need any help with writing or ordering the letters.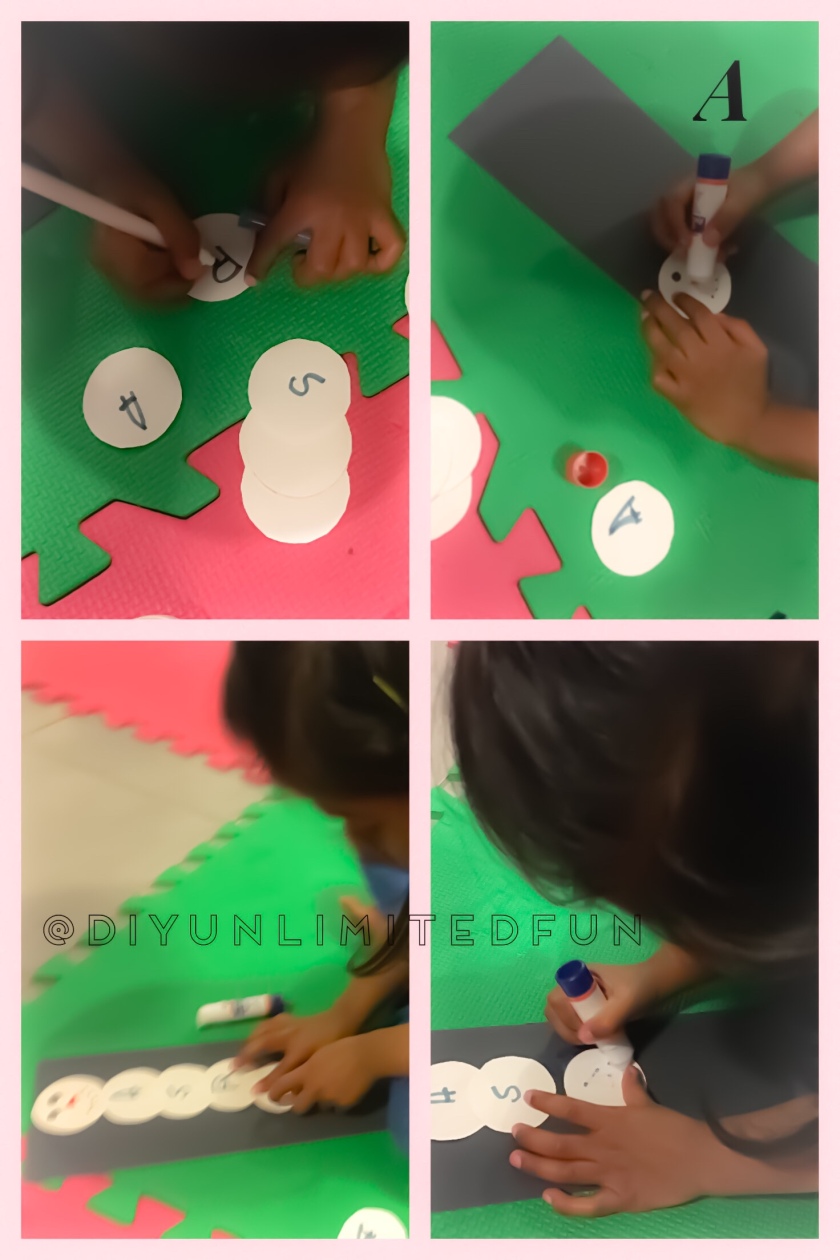
Miss D(3) wrote the letters in her name with some help, i had to tell her what letters to write and which order to glue them. For even smaller kids you could write it for them and ask them to glue it. Once done we used painters tape to put it up on their playroom wall. They were so proud of their work. 😀
While doing this activity they learnt the order of letters in their name and also spoke about – how many letters they have in their name, whose name is longer, how many As does your name have and so on.


Wish you and your Family a Happy & Prosperous New Year!! Cheers!!
Lavanya
Its going to be snowing heavily here and snowfall warning has been issued.. Looks like a winter wonderland out there.. A perfect dreamy white Christmas for us!

From ours to yours – Wishing you & your family a Merry Christmas & Happy Holidays!!
Cheers
Lavanya
I guess we are in full christmas mode right now. We made another ornament yesterday evening. Thats three in a row. Well A insisted we had to do one more and i couldn’t think of a more easy ornament to make than this Jingle Bell Wreath.

Follow us on Facebook
What you need
How to

This looks absolutely beautiful on the tree and my kids loved shaking it to hear the bell sound. Very Christmasy!!
My LOs favourite song this season is Reindeer Hokey Pokey(A’s class performed for this in school winter assembly this Tuesday) & Rudolph the Red Nose reindeer. They sing this everyday and have to watch it atleast once before bedtime. So, we decided to make a reindeer craft last evening. This Reindeer Ornament is easy to make – takes less than 5 mins and kids love it.

Follow us Facebook
What you need
How to

Miss A(4) & Miss D(3) loved making this ornament. I showed them where to glue the sticks, pompoms and eyes and they did it all by themselves. 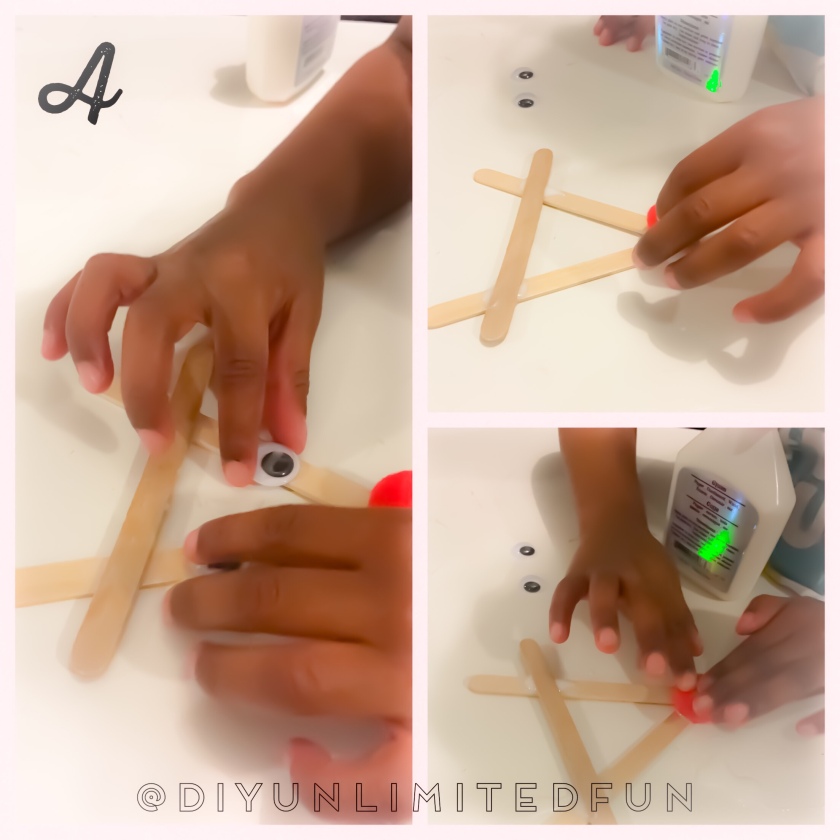 I let it dry overnight and the girls put it up on their tree before they left for school this morning. 😀
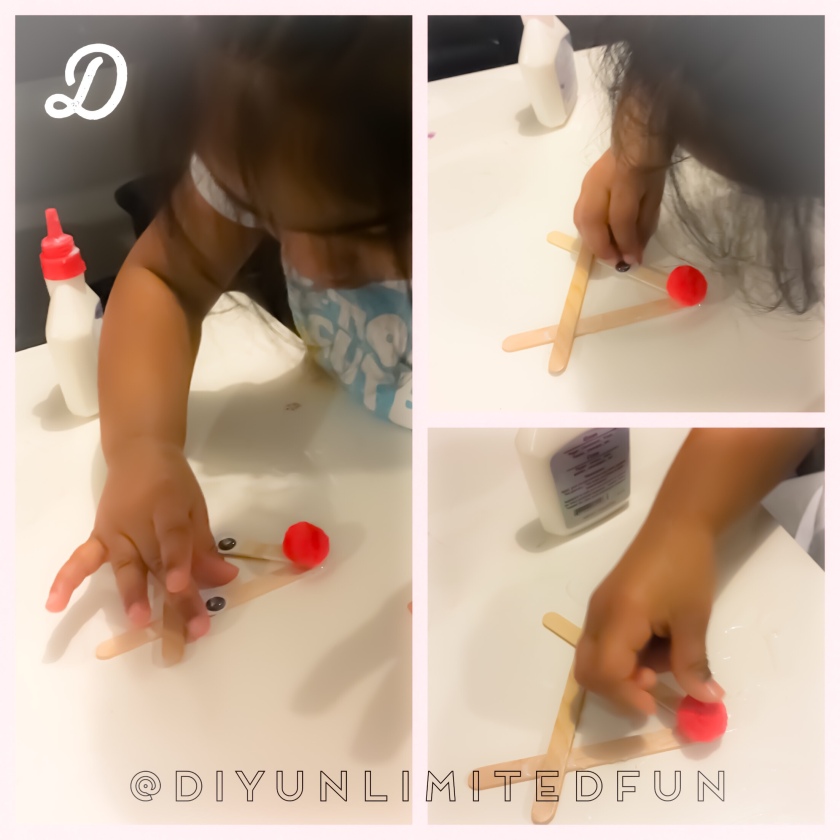
My LOs enjoyed making some ornaments for our tree last year and i love to see them on the tree this year. Now, they have their own christmas tree and love decorating it. This Star Ornament is perfect for it, super easy to make, looks cute when done and is a great for building fine motor skills.

Follow us on Facebook
What you need
How to
Let your LOs thread the beads onto the pipecleaner. A(4) & D(3) did this patiently. A even counted the number of beads (was totally her idea – guess its the impact of doing similar math activities). Once they were done, i twisted the ends together and bend it into star shape. Then used a hemp cord, made a knot and gave it to them. They happily put it up on their tree.

You could bend the pipecleaner into star shape before you thread the beads for a perfect shape, because it was a lil tricky to get a good shape after. It takes approx. 45 beads and one pipecleaner to make one star ornament.
